Blog :: SDL Tutorial Part 0x00 - Boilerplate, Windowing and Rendering
SDL2 is my favorite graphics library right now. It might not be as powerful as something like raw OpenGL, but it's simple. Simple enough that you can just pick it up and start using it. There's a glaring issue with it, though. The documentation is horrible. Absolutely horrible. A lot of it is unfinished, and it doesn't look like it's getting attention any time soon. The SDL1.2 documentation wasn't as bad, but that version of the library is vastly outdated by today's standards. So here's my take on a tutorial for SDL - part 0x00 of a I-don't-know-how-long-I'm-going-to-drag-this-on series. My examples are going to be written in C, because the constructs I show here can still be used verbatim in C++ (and probably SDL's other language bindings as well). This tutorial will be covering the little boilerplate that SDL requires, as well as the basics of windowing and rendering. Let's get into it.
The first thing you have to worry about is installing and setting up SDL2.0. I won't cover it in detail because it's something you should be able to figure out yourself. If your operating system doesn't provide a means of package management, you should be able to find a download on the official website.
You should also figure out how to link SDL2 when you're compiling, nothing I teach here will work if it isn't properly linked. If you're having trouble with anything, fire up your favorite search engine or feel free to contact me.
Alright, assuming you've successfully installed SDL, let's get to actually programming. As with any C library, the first thing you should worry about is including the header files. While SDL provides header files for specific subsystems, we're not going to worry about that right now. There's a header file that contains everything and we're going to use that for right now.
#include <SDL2/SDL.h>
Depending on how header files are organized on your system, you may have to use this instead:
#include <SDL.h>
That will give us function prototypes and type definitions for everything in the SDL library, but we have to initialize SDL before we can really do anything with it. This is actually really simple, done with a single function call.
SDL_Init(SDL_INIT_VIDEO);
SDL_Init takes a flag as a parameter so it knows which subsystems to
initialize. A parameter. One, not several. This might be a bit confusing to
some, especially if you're not familiar with bitwise arithmetic, but
SDL_INIT_VIDEO is nothing more than a preprocessor macro representing some
number. SDL_Init interprets that number, and initializes the subsystems
associated with it. We don't write the number out in our code, though (or at
least you shouldn't). We use the macros, but there aren't macros for every
combination of subsystems you can come up with. Does this mean that SDL can only
initialize one subsystem at a time? Not at all, to combine macros and represent
multiple subsystems, you would hook them together with the bitwise OR operator.
(|, not ||). For example, if we wanted to initialize SDL's video AND audio
subsystems, we would do this
SDL_Init(SDL_INIT_VIDEO | SDL_INIT_AUDIO);
But we're not going to be working with audio just yet.
SDL_Init also returns an integer value, and it's pretty important. If it's
zero, SDL was initialized properly. Great! But if SDL can't be initialized for
some reason, it will return a negative number. This is where another SDL
function comes into the picture. SDL_GetError takes no arguments, but will
return a string literal explaining what went wrong. So if we wanted to do some
error checking (which you always should), we could do this:
if (SDL_Init(SDL_INIT_VIDEO)) {
    fprintf(stderr, "Here's the error: %s\n",
            SDL_GetError());
    return 1;
}
You can pretty much do anything here to handle the error. I'm using fprintf(3)
for simplicity, but SDL provides more advanced logging features which I'll cover
in a later tutorial.
In SDL, you need to be responsible and clean up after yourself. For every
function that initializes or creates something, there is a complementary
function that deinitializes or destroys it. The function to counter SDL_Init
is SDL_Quit. It takes no parameters and returns nothing, you can just call it
and be done with it. With that covered, we've learned SDL's few lines of
boilerplate code. Much more appealing than something like Direct3D, eh? If you
compile and run the program right now, nothing interesting will happen. It
initialized and deinitialized SDL (unless something went wrong), but didn't
bother creating windows or doing anything because we didn't tell it to. Let's
change that. We first have to know about two important typedefs in SDL.
SDL_Window, and SDL_Renderer. SDL_Window is self-explanatory, it's a struct
representing a window, and SDL_Renderer is how you would put something into a
window. Renderers in SDL are capable of hardware acceleration and vertical-sync,
which is why SDL2 is awesome and SDL1.2 is left in the dust. These are just
structs, though, they don't do anything by themselves. Let's create a window,
and capture it in a SDL_Window struct:
SDL_Window *my_cool_window = SDL_CreateWindow("A Cool Window",
                                              SDL_WINDOWPOS_UNDEFINED,
                                              SDL_WINDOWPOS_UNDEFINED,
                                              400, 400, SDL_WINDOW_SHOWN);
Whoa, that's a mouthful, but it isn't as complicated as it looks. The first
argument is just a title for the window; you can name it whatever you want. The
next two arguments are X and Y values for where the window should be placed on
the screen. People usually don't care about this; you can use
SDL_WINDOWPOS_UNDEFINED if you don't. After that are the window's width and
height. I'm choosing to make my window 400 by 400 pixels, but you can choose
whatever size works best for your program. There are ways to change it later on,
too. Finally, we get to a flag. Its usage is similar to the flag we used with
SDL_Init, you use a bitwise OR to combine flags. We're not doing anything
fancy just yet, though, so SDL_WINDOW_SHOWN on its own will suffice. It
ensures that the window will be visible, rather than minimized.
As you can hopefully tell from the example code above, SDL_CreateWindow
returns a pointer of type SDL_Window. If a window cannot be created, though,
it will return NULL. You should always do error checking, so throw something
in to see if my_cool_window (or whatever you named your window variable) is
NULL.
if (!my_cool_window) {
    fprintf(stderr, "Window couldn't be created. %s\n",
            SDL_GetError());
    return 1;
}
There's SDL_GetError again! He's our friend and you should be using him every
time you do error checking.
Remember how I said that SDL has a complementary function to destroy anything
that is created? This is no exception. SDL_DestroyWindow is very similar to
SDL_Quit, but it takes a SDL_Window pointer as an argument.
SDL_DestroyWindow(my_cool_window);
It's sad to see him go, but we're done so we need to free the resources. At this
point, you can compile and run the C source file. It still kinda sucks, though.
When you run it, the window pops up and immediately goes away. One useful
function is SDL_Delay. It might seem mundane now, but it will become quite
important when we need to cap our program's framerate. It takes a number of
milliseconds as a parameter and temporarily stops your program so that SDL and
your computer can take a short break. Alright. So when we put that in our code
(after the window creation but before the window destruction), compile, and run
it, we get this:
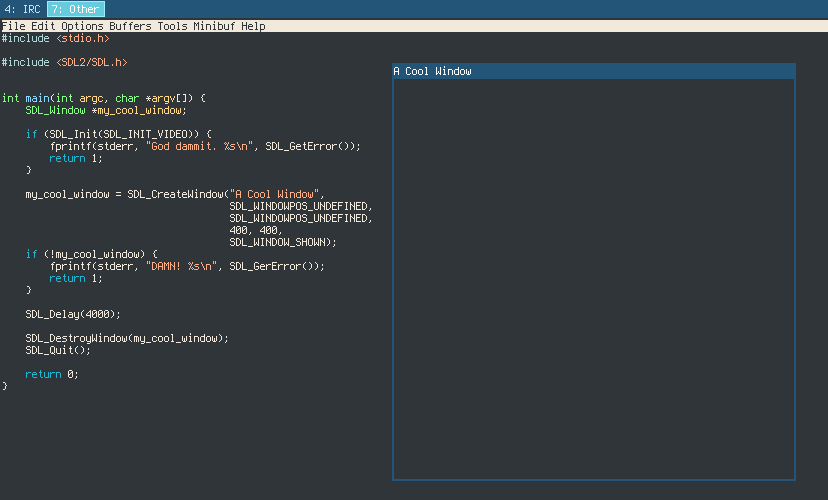
I'm running i3wm, so it will probably look slightly different for you, but we've finally got a window! It still sucks, though. It doesn't do anything, it doesn't even clear itself! Let's make it white and learn a little bit about renderers in SDL.
If we want to do stuff within a window, we have two options. One is to create an
SDL_Surface from the window and draw to the surface, which is the sucky legacy
way of doing it so we're going to pretend that I didn't mention it, or you can
create a SDL_Renderer, which we're going to do because it's so much more
capable. We're going to use another SDL function call to create a renderer, and
we'll capture it in a SDL_Renderer pointer:
SDL_Renderer *my_cool_renderer;
SDL_CreateRenderer(my_cool_window, -1,
                   SDL_RENDERER_ACCELERATED);
if (!my_cool_renderer) {
    fprintf(stderr, "There was an error %s\n",
            SDL_GetError());
}
Alright, so clearly the first argument is the window we want to create a
renderer for. The second is more complicated. It's the index of the driver to
initialize, which you probably don't care too much about so you can just put -1
in there to have it use the first one that's available. The last is a flag,
which you probably know so much about by now. Finally, as you can imagine,
SDL_CreateRenderer returns NULL if a renderer cannot be created. This should
all seem pretty familiar, it's the same format as creating a window - create a
struct pointer to capture it, use a function call to create it, and do some
basic error checking. Dead simple, and it just gets better from here.
Once again, don't forget to clean up after yourself. The function to remove a
renderer when you're done with it is SDL_DestroyRenderer. It just takes a
SDL_Renderer pointer as an argument.
Now we've got a renderer, but if we compile and run our code - the effect is the same because we haven't used it for anything. So let's change that and learn a little bit about drawing in SDL.
Renderers in SDL have a color associated with them, which they use when drawing
primitive geometry like lines and quadrilaterals. It doesn't affect textures,
but you'll probably end up using primitive geometry at some point so it's good
to know. SDL_SetRenderDrawColor changes the aforementioned color. We're
actually not going to be drawing any primitive geometry in this tutorial, but
I'm bringing this up because the renderer will use its associated color when
clearing the screen. So more about the function - it takes a renderer as an
argument, followed by red, green, blue, and alpha (transparency) values. I'm
going to make mine white (0xFF, 0xFF, 0xFF, 0xFF), but feel free to experiment.
After that, we'll be calling SDL_RenderClear, which takes a renderer as an
argument and, as I briefly mentioned a few lines ago, fills it with whatever
color the renderer is currently associated with. And finally, we'll call
SDL_RenderPresent to update the screen. This is where some people get a little
confused. Basically, in SDL you draw everything and then update the screen,
meaning that you have as much time as you want to make the scene perfect before
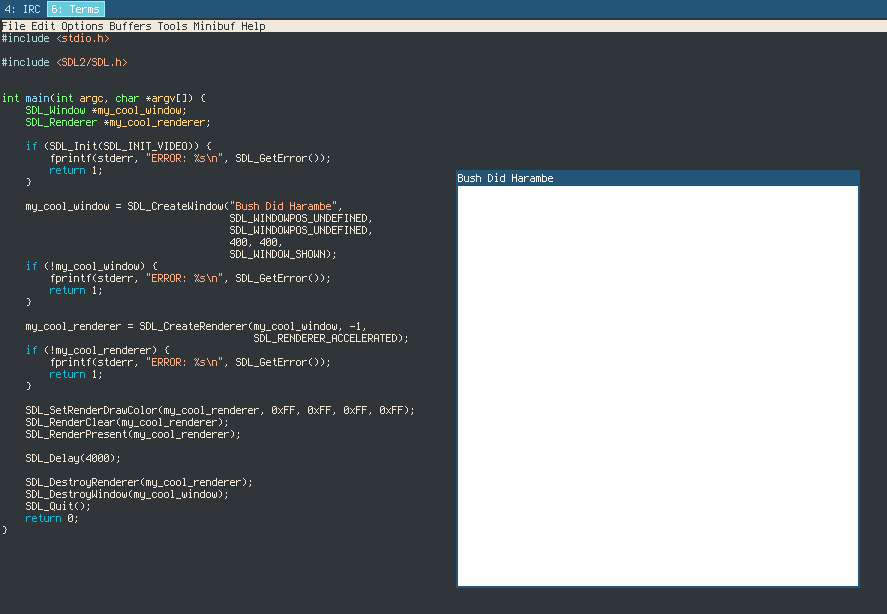
you have to show it to the user. And we're pretty much done! Let's look at the
basic program:
#include <stdio.h>
#include <SDL2/SDL.h>

int main(int argc, char *argv[]) {
    SDL_Window *my_cool_window;
    SDL_Renderer *my_cool_renderer;

    if (SDL_Init(SDL_INIT_VIDEO)) {
       fprintf(stderr, "ERROR: %s\n", SDL_GetError());
       return 1;
    }

    my_cool_window = SDL_CreateWindow("Bush Did Harambe",
                                      SDL_WINDOWPOS_UNDEFINED,
                                      SDL_WINDOWPOS_UNDEFINED,
                                      400, 400, SDL_WINDOW_SHOWN);
    if (!my_cool_window) {
        fprintf(stderr, "ERROR: %s\n", SDL_GetError());
        return 1;
    }

    my_cool_renderer = SDL_CreateRenderer(my_cool_window,
                                          -1,
                                          SDL_RENDERER_ACCELERATED);
    if (!my_cool_renderer) {
       fprintf(stderr, "ERROR: %s\n", SDL_GetError());
       return 1;
    }

    SDL_SetRenderDrawColor(my_cool_renderer, 0xFF, 0xFF, 0xFF, 0xFF);
    SDL_RenderClear(my_cool_renderer);
    SDL_RenderPresent(my_cool_renderer);

    SDL_Delay(4000);
    SDL_DestroyRenderer(my_cool_renderer);
    SDL_DestroyWindow(my_cool_window);
    SDL_Quit();
    return 0;
}
Let's run it:
To recap, we learned about:
SDL Functions
- SDL_Init: Used to initialize SDL. Takes a flag as a parameter. Returns 0 if it succeeds, or a negative value if it fails.
- SDL_Quit: Complements
SDL_Init. Takes no parameters and returns nothing. - SDL_CreateWindow: Creates a window and returns a pointer to it, or
NULLif it fails. Takes a title, X and Y positions, width, height, and a flag as parameters. - SDL_DestroyWindow: Complements
SDL_CreateWindow, takes aSDL_Windowpointer as an argument and returns nothing. - SDL_CreateRenderer: Called to create a renderer, and returns a pointer to
it, or
NULLif it fails. Takes theSDL_Windowpointer for the window you want to create a renderer for, an index (usually -1), and a flag as parameters. - SDL_DestroyRenderer: Complements
SDL_CreateRenderer. Takes aSDL_Rendererpointer as an argument and returns nothing - SDL_Delay: Takes a number of milliseconds as an argument, and proceeds to wait for that period of time.
- SDL_SetRenderDrawColor: Takes a renderer, red, green, blue, and alpha values as arguments, and changes the color associated with the given renderer.
- SDL_RenderClear: Takes a renderer as an argument and fills it with whatever color is currently associated with that renderer.
- SDL_RenderPresent: "Refreshes" the renderer, presenting the image to the user.
Type Definitions
- SDL_Window: Captures the result of
SDL_CreateWindow. - SDL_Renderer: Captures the result of
SDL_CreateRenderer.
And if you would like to read more, here are some additional resources:
- SDL Documentation - SDL_Init (Remarks)
- SDL Documentation - Window Flags
- SDL Documentation - Renderer Flags
You're still reading? Well, this is my first tutorial ever. If you have any feedback, be it positive or negative, I'd love to hear it! I hope this tutorial was helpful, there are many more to come.
Comments (1)
Thank you :) This was well written and to the point. I have just started with SDL2 and feeling a little confusion as there seams to be x number of ways to achieve a similar outcome. Unfortunately I am not seeing any of the pros or cons of different methods in the documentation so I am relying upon blogs and forum posts like this.
Leave a Comment